
CA GROWN Blog
Discover. Learn. Connect.
How to Build an Easy and Effortless Cheese Board, California-style
Meet Them Here
Read Bios »How to Build an Easy and Effortless Cheese Board, California-style
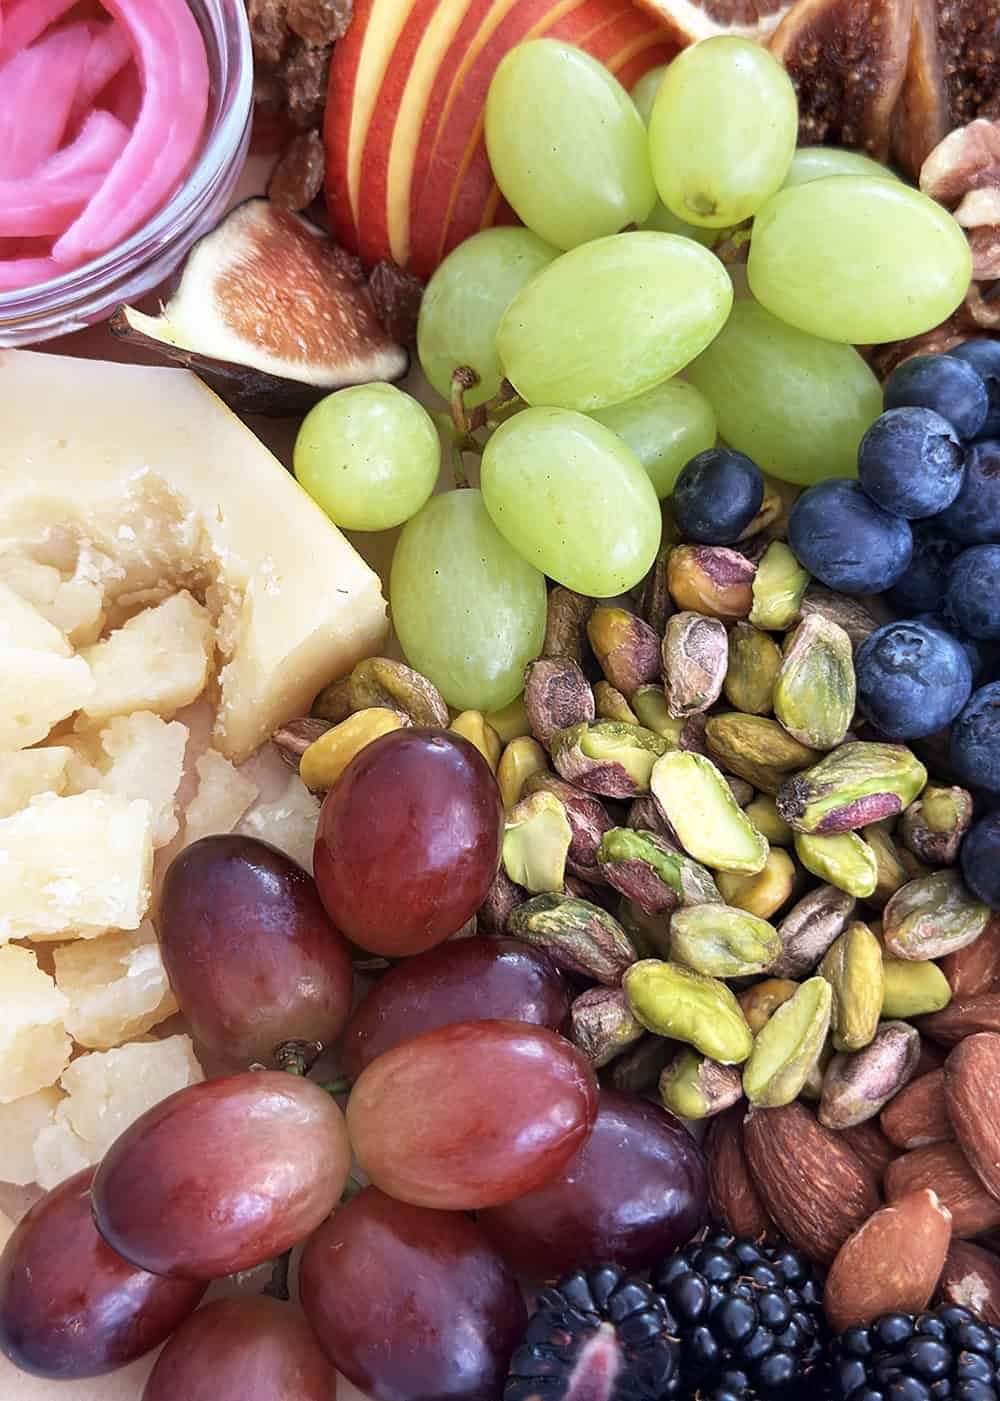
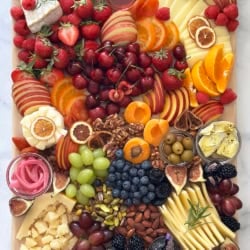
As we head into the season of long sunny days that slip into golden evenings, entertaining at home naturally shifts toward the easy and effortless. And nothing is simpler than setting out a CA GROWN cheese board with locally made cheeses that reflect the landscape, peak-season produce like sun-ripened stone fruits and fresh berries, and dried fruits concentrated with sweetness and flavor. There’s no need to overthink it when the ingredients are this good and naturally complement one another.
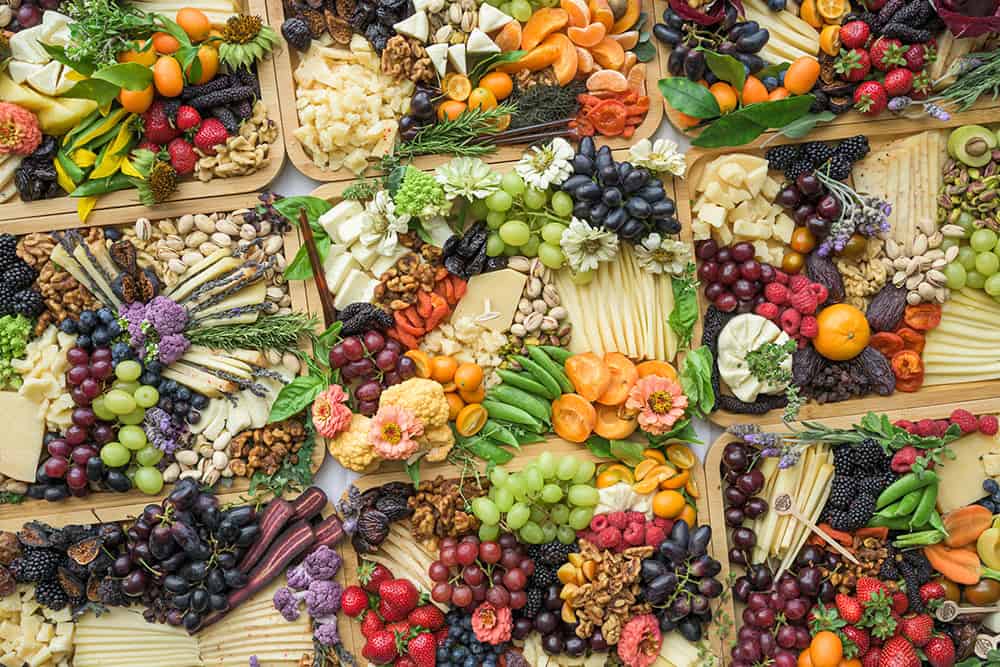
Here’s your guide to building the perfect CA GROWN Cheese Board, the epitome of relaxed, unfussy hosting at its best, exactly how summer is meant to be enjoyed.
What are the Best Cheeses for a Cheese Board
You can’t have a cheese board without, of course, the cheese. Here’s how much and what kind of cheese you need.
Estimate 2-3 ounces of cheese per person, adding a couple of ounces if your cheese board is the main attraction.
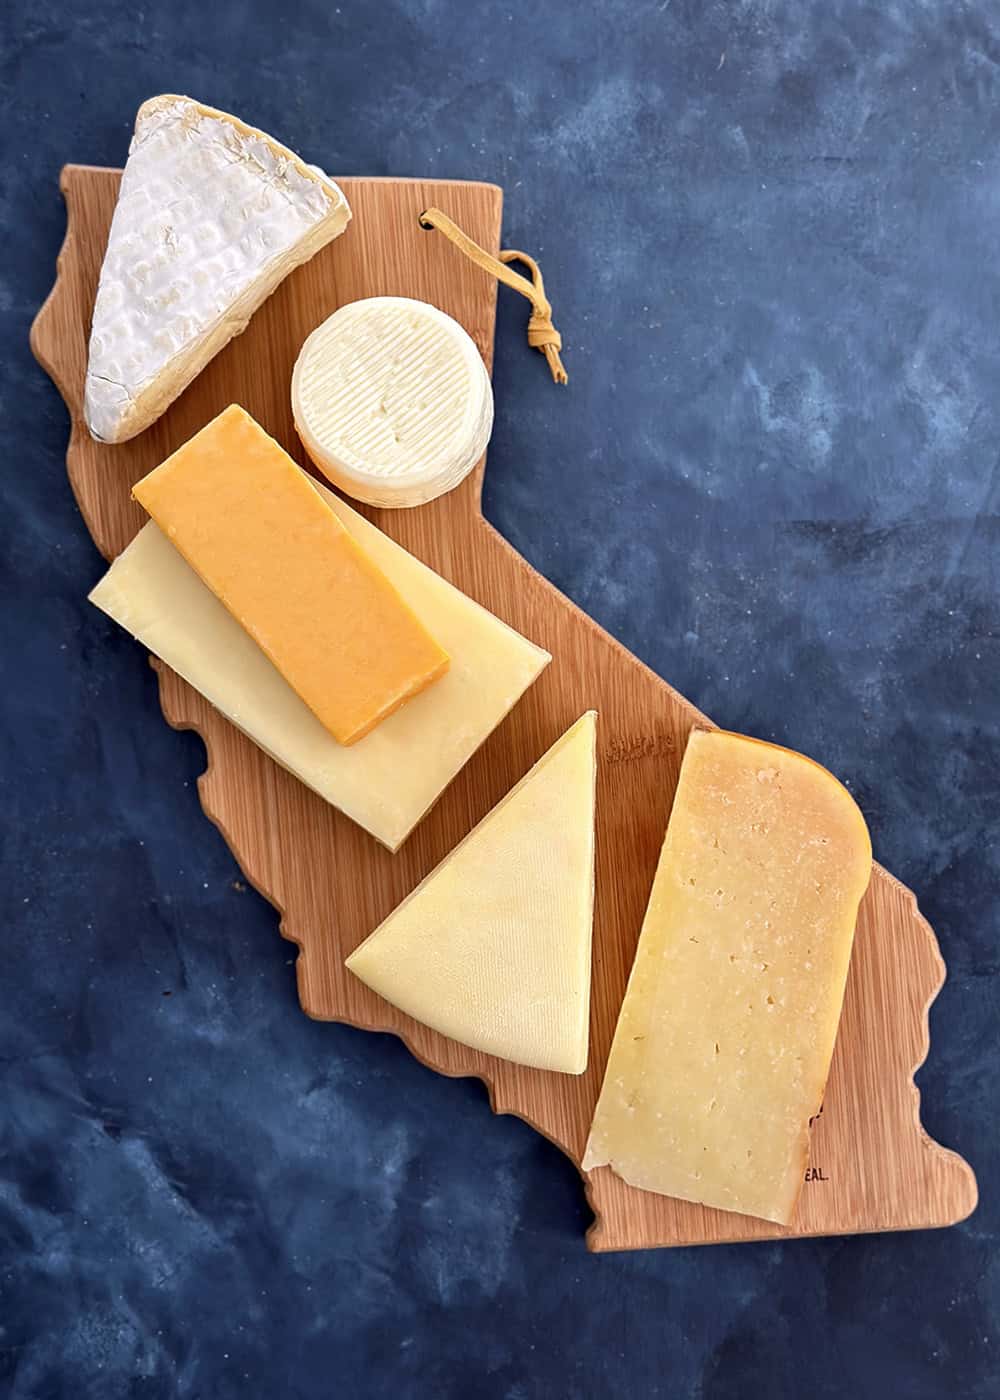
As for what kind? A good rule of thumb is 3-5 different cheeses that vary in taste, texture, and intensity, and California has you covered across the board, pun intended!

Here are some specific examples from each type:
- soft, bloomy rind cheese like Brie
- semi-firm like cheddar, or Gouda
- hard, aged cheese like a dry Jack or aged Gouda
- blue cheese for something a little more interesting and intense
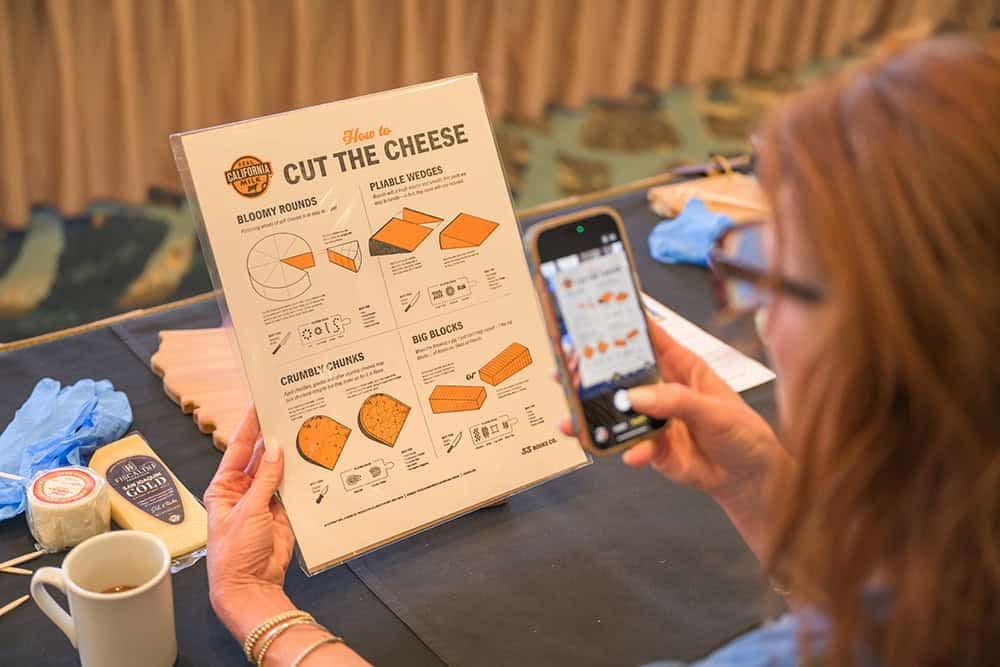
How to Slice and Cut Cheeses for a Board
If there’s ONE thing that you take away from this guide, it’s slicing cheeses in advance and arranging them on the board for easy access and maximum enjoyment!
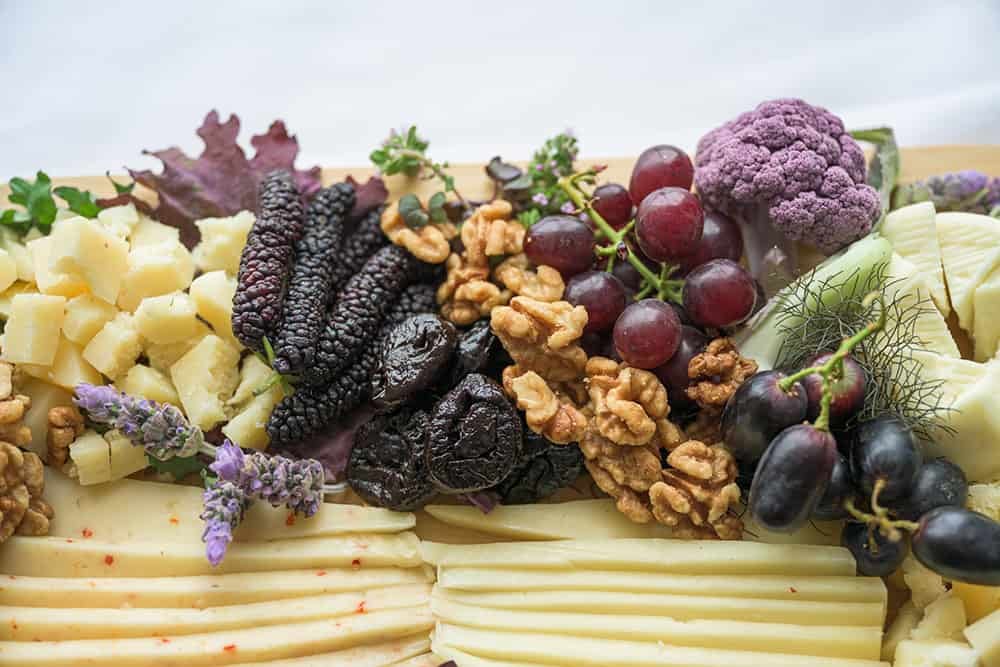
There’s nothing wrong with plonking down a big wedge of cheese on a wooden board, but there’s something very right about cutting cheeses into individual, single-serving slices. Not only can you arrange the pieces into a pretty design on the board, but guests can easily pop a piece, or build a delicious bite for themselves with other accompaniments for themselves. This is especially helpful for semi-firm and hard cheeses, which are harder to cut, especially if they’re placed on a board with other ingredients around them.
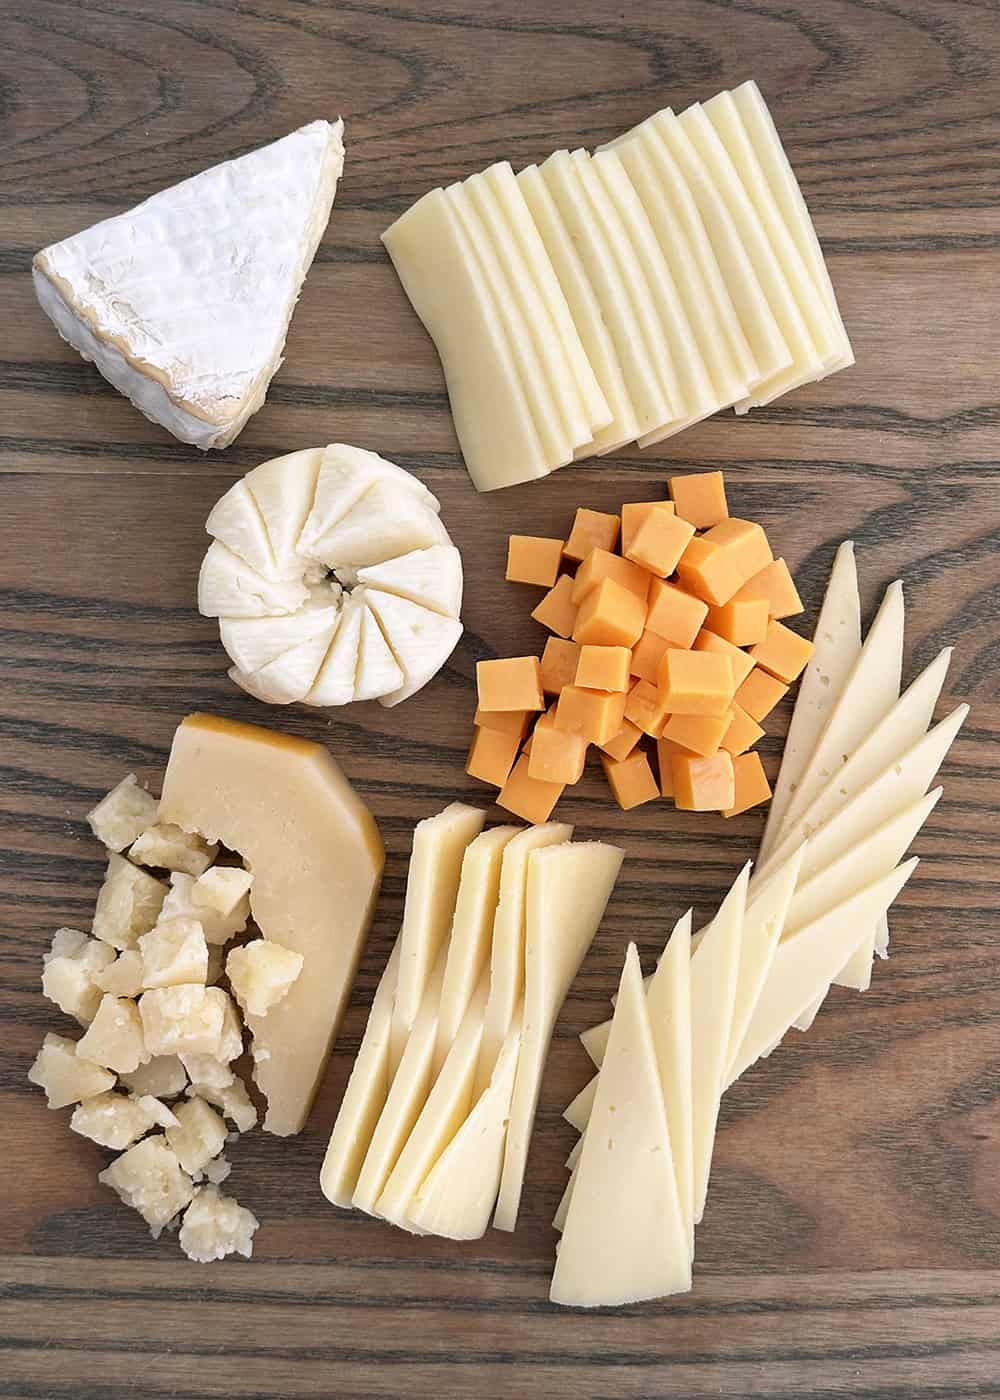
Here’s how to cut and slice different types of cheeses:
- Very soft cheeses are easy to cut, so you can leave something like a wedge of brie as is, and just insert a knife into the wedge to indicate where guests can start cutting.
- Cut soft round cheeses into small wedges like pie pieces, which you can fan out.
- Two ways to cut semi-firm rectangular blocks: either into rectangular slices, which you can fan out, or cut semi-firm rectangular blocks into cubes that are easily piled onto the board.
- Slice semi-firm wedges along the side that make triangles, then arrange into a “zipper” or fan out into a dragon tail.
- Crumble hard cheeses by sticking a fork or the tip of a knife into the cheese and gently breaking off bite-sized chunks.
Best Fruit for a Cheese Board
When it comes to fresh fruit for a cheese board, let the season guide you and pick out what looks freshest at the market. Three to five different kinds of fresh fruit is a good place to start, making sure to vary the colors, tastes, and textures. Certain fruits, like berries, are almost always available year-round. In the cooler months, look for apples, pears, grapes, late-season figs, and persimmons.
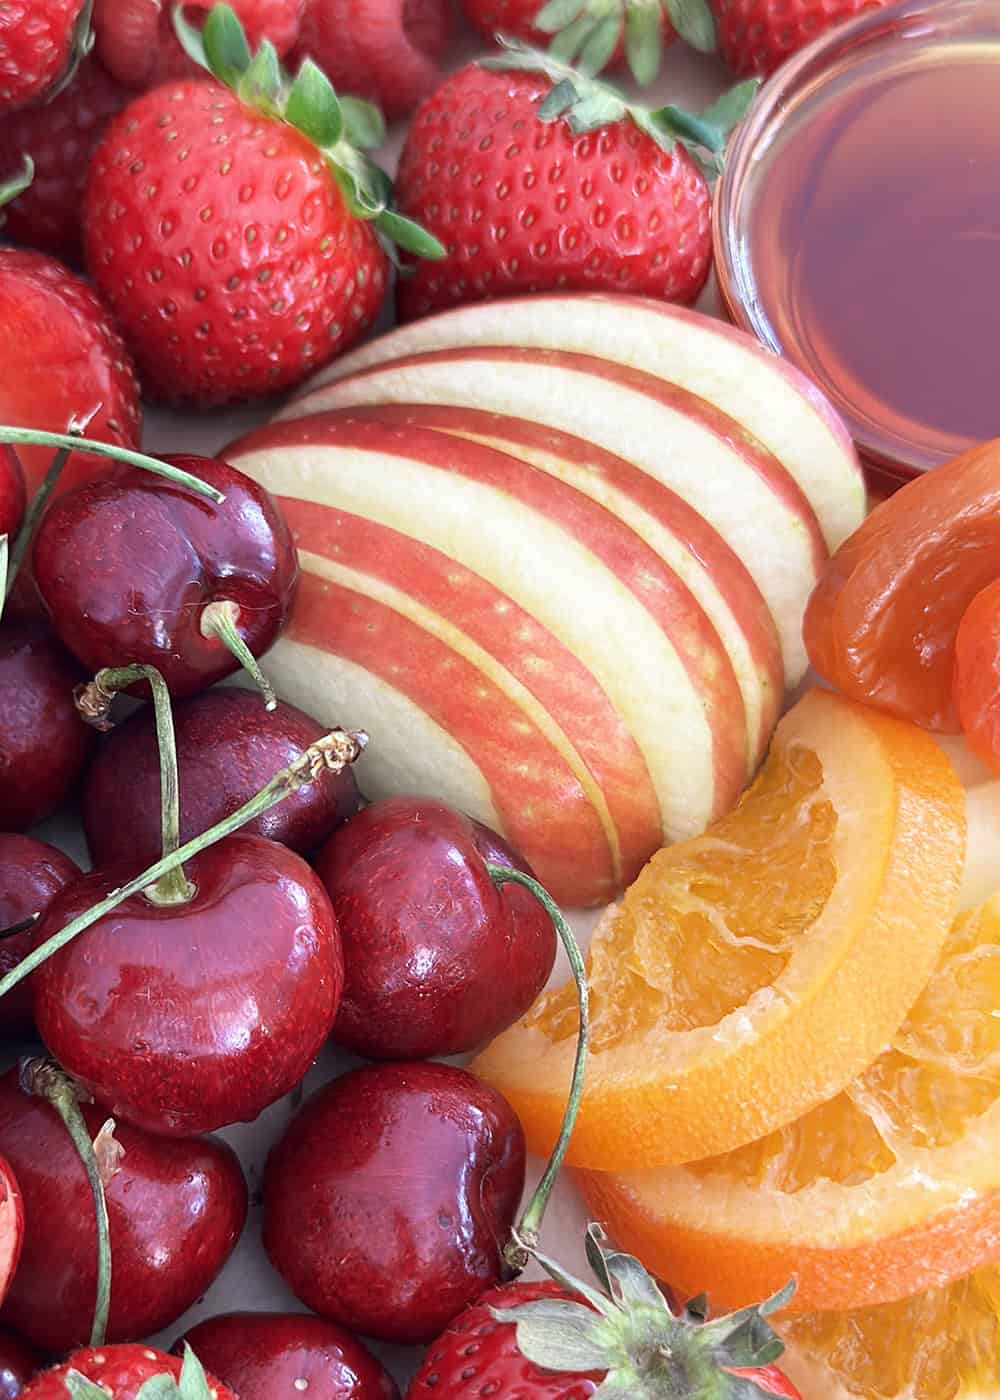
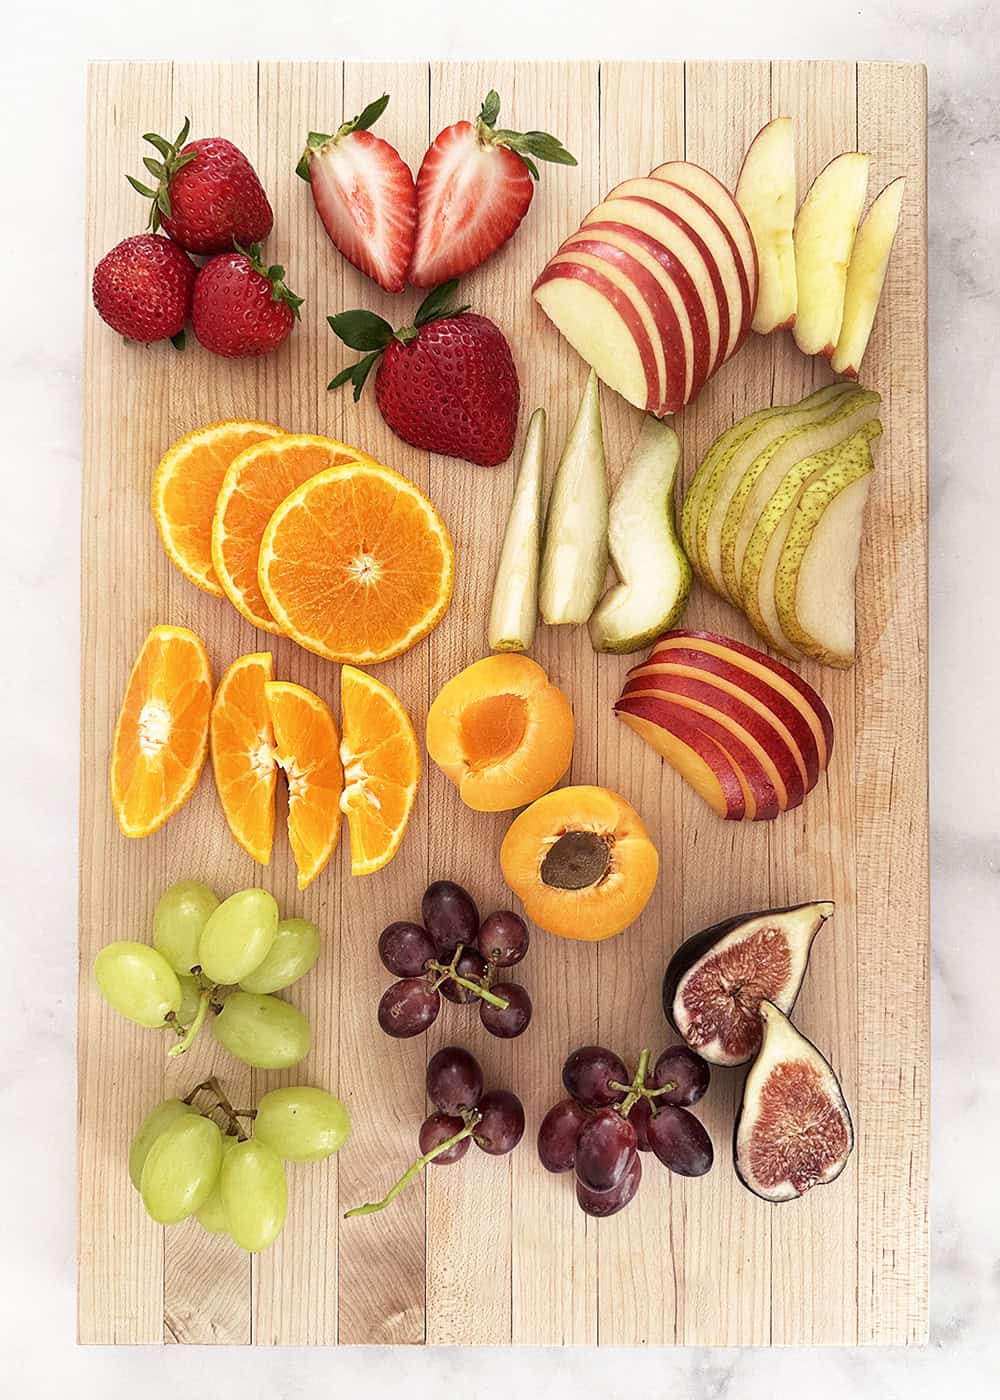
Berries can be left whole. Snip bunches of grapes into small clusters. Cut larger fruit like apples and peaches into slices, which can be easily paired with a slice of cheese into a single bite!
- strawberries
- raspberries
- blackberries
- blueberries
- cherries
- peaches, nectarines, and plums
- figs
- grapes
- apples and pears
- persimmons
- sweet citrus like oranges and tangerines
Fun fact alert: strawberries are technically in season year-round in California!
California Dried Fruit is Always in Season
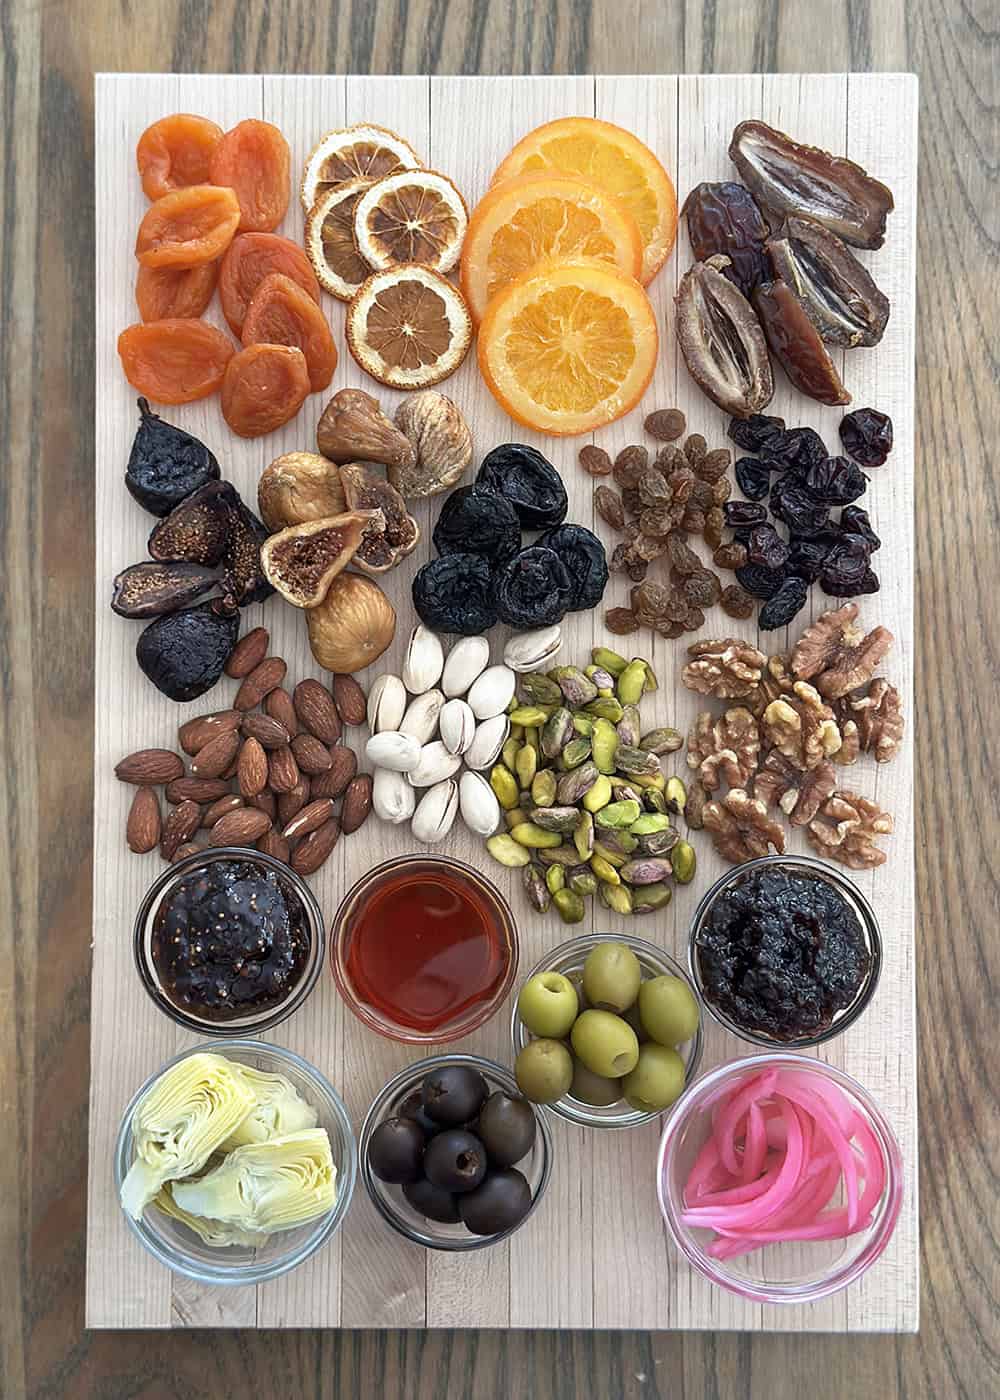
Choose at least one, probably two, and possibly even three types of dried fruits, which provide concentrated sweetness and a slightly chewier texture than fresh fruit to balance the cheeses. In the cooler months, you can add more dried fruits when fresh fruits might be a little more limited. These California-grown dried fruits are always in season and always favorites:
- dried apricots
- dried citrus
- dates
- dried figs
- prunes
- raisins
- dried persimmons
Best Nuts for a Cheese Board
Choose 1-3 types of raw and/or roasted almonds, pistachios, and walnuts to add that much-coveted crunch that contrasts so well with the rich, creamy texture of cheese. If you want to add some interest, try flavored nuts, and if you have the time and energy, make one of these recipes for Fiery Candied Walnuts or Roasted Garlic Rosemary Almonds.
Make it Extra with Spreads, Pickles, and Garnishes
All the sweet and savory spreads and little pickled things are a welcome flavor bonus on a cheese board, and since many of these ingredients are available pre-made, you don’t have to do much beyond twisting off a lid from a jar of honey or pop a can of California ripe olives. Of course, you can also make some of them from scratch. Make it as extra or easy as you’d like.
Choose at least one sweet spread like honey or a fruit-based jam. Get them straight from the jar or make it extra with these recipes for California Grown Whipped Honey Recipe, Pinot Prune Jam, or California Prunes sweet and tangy Prune Mostarda.
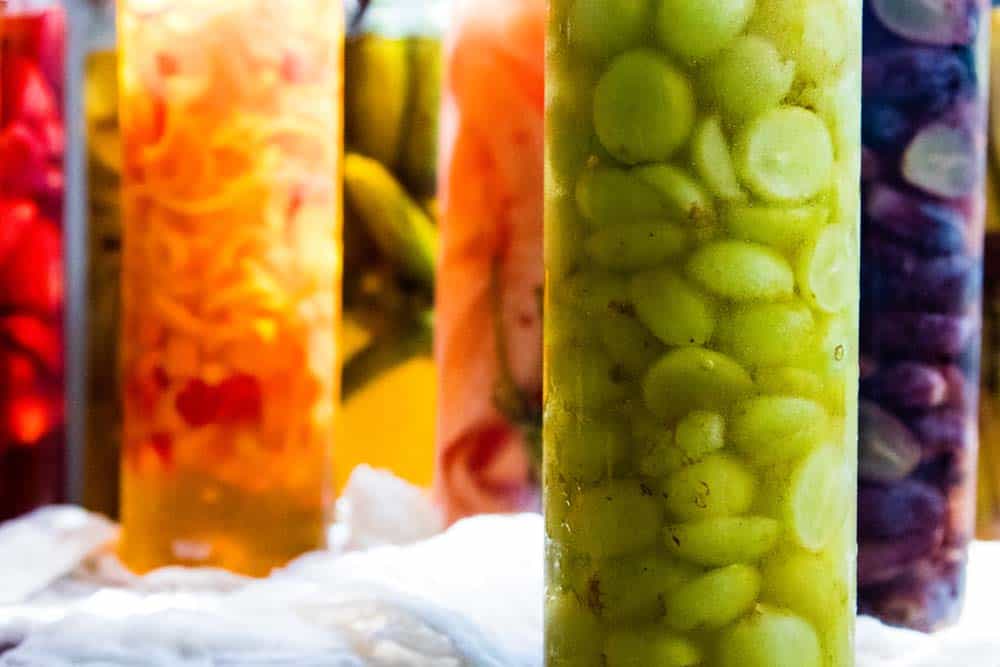
Little pickled extras are nice to have, since they provide a complementary savory element to salty cheeses. California Ripe Olives, pickled onions, and marinated artichokes are great options that are always available.

The final touch is a garnish, and fresh herbs or edible flowers are easy to throw on right before serving.
No Special Tools Required
A cheese board is easy entertaining because it doesn’t require much, if any, cooking. That means it doesn’t require any specialized tools or equipment! You just need a sturdy cutting board, a sharp knife, and of course, the board or platter. You will also want small bowls and spoons for serving.
If you don’t have a large enough board or platter for the group you’re entertaining, spread out a piece of parchment paper on the tabletop and put together your “board’ directly on the paper, the ultimate in low-key, laidback entertaining.
Pro-tips for Building the Perfect Cheese Board
- Go with a theme. When it comes to building a cheese board, ingredient options are truly endless. So, it’s helpful to choose a theme to help you narrow your choices. “California-grown” is our favorite theme, but you can focus even more with a holiday or an event.
- Cut large fruit and vegetables into individual, bite-sized pieces. Berries are already bite-size so they’re ready to go as-is! But any particularly large strawberries and larger fruits and vegetables like apples and pears need cutting. You can leave the skins on for color (and fiber!) and cut into slices or thin wedges. Slice citrus with their skins into round sunshines or small wedges to show off their bright interiors.
- Make mini grape clusters. Snip the stems on bunches of grapes into small clusters that have 3-4 grapes.
- Serve both contrasting and complementary flavors and textures. For example, pick a sweet fruit like berries and figs, and a tart fruit like apples. Select dried fruits that might not already be on the board as a fresh version, e.g., dried figs. The savory crunch of nuts will naturally balance the sweet softness of fresh fruit. Contrast and complements come naturally from the addition of all the accompaniments you add to the cheese board, so you don’t actually have to overthink this.
- How many different kinds of cheese? Select 3-5 cheeses that vary in taste and texture. A good place to start is one each of a soft, mild cheese like a Brie or Camembert style, a semi-soft cheese like cheddar or jack, and a hard, aged cheese like Dry Jack or aged Gouda. If there are hardcore cheese lovers in your gathering, add a pungent blue cheese.
- How much cheese should you serve? Estimate 2-3 ounces of cheese per person. If your cheese board is the main attraction, add a couple of ounces more per person. You may have leftovers, but who doesn’t love a little bit of leftover cheese in the fridge the next day?
- Pre-slice cheeses. There’s nothing wrong with plunking a huge wedge of cheese onto a board and serving it as is, but pre-slicing semi-soft and harder cheeses is key to making a cheese board easy and effortless
- Let cheese loosen up before serving. Just like you the host, your cheese wants to loosen up a little before the party, so let it sit out about 30 minutes before serving so it has a chance to warm up, allowing the texture to soften and flavors release.
- Place honey and spreads toward the edges of the board so there’s less of a reach and less chance of dripping or spilling over the board. This is more important on larger boards.
- Add something unexpected to give your guests something to talk about. This could be anything from edible flowers as a garnish to a fruit jam that you’ve made yourself!
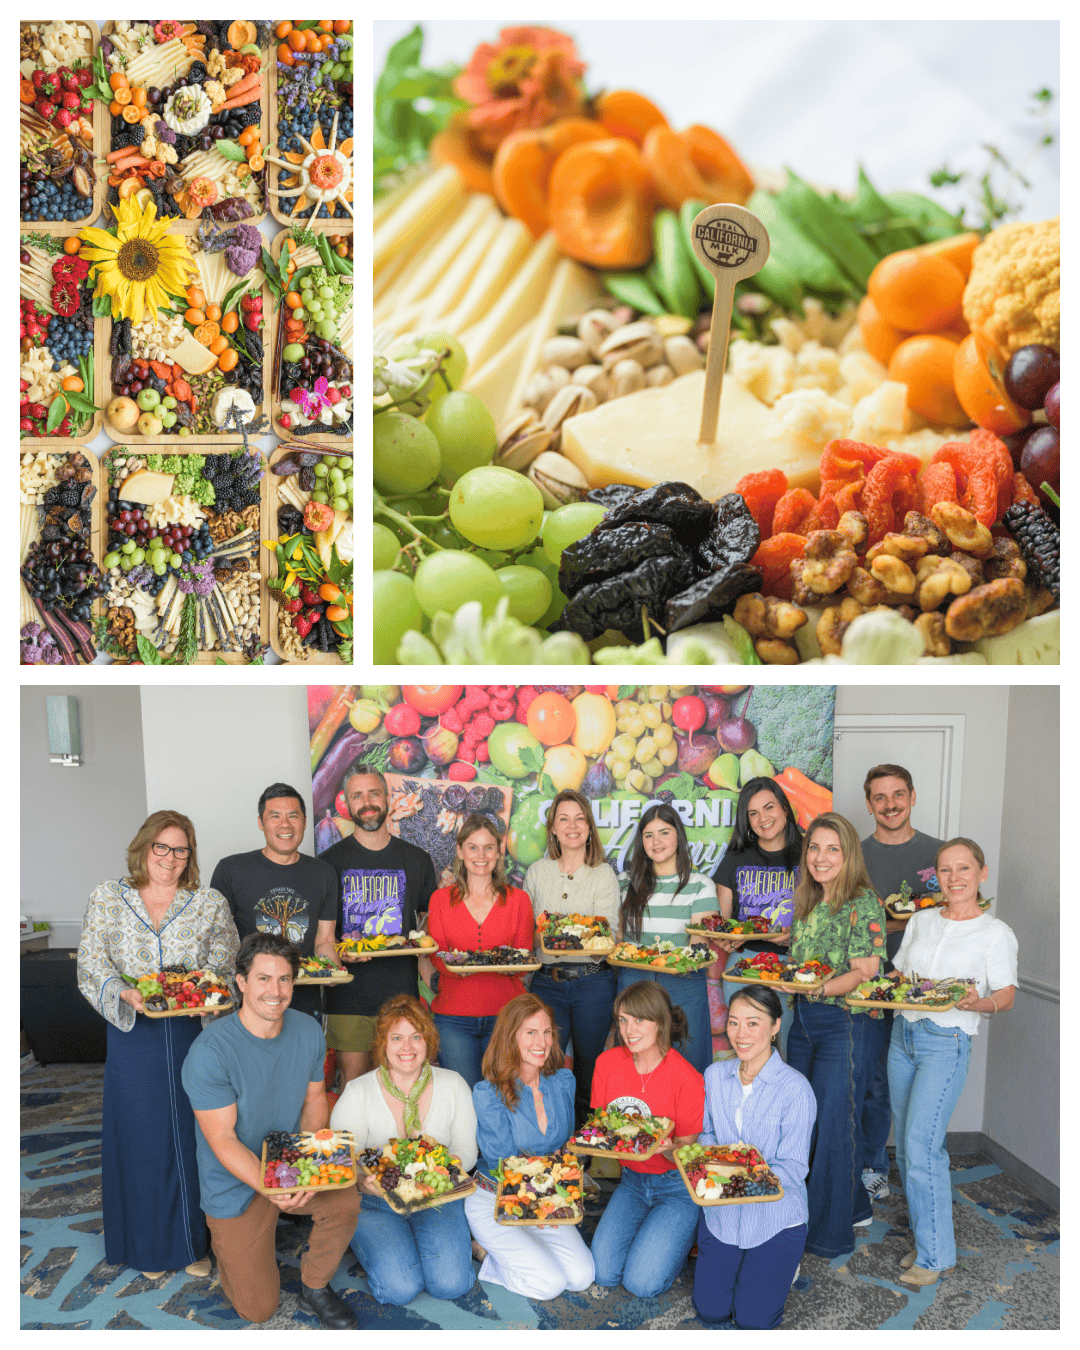
Creative Cheese Board Ideas with Real California Cheese
Struggling to come up with creative cheese board ideas for your delicious Real California cheese? We’ve got all the info you need – and plenty of stunning inspiration, too!
There’s no wrong way to build a California cheese board. In our humble opinion, cheese boards are an art – and we all know that art is subjective. So, the first rule of cheese board creation is that there ARE no rules. Our goal isn’t to tell you exactly how to build your cheese board. Our goal is to share a few helpful tips and lots of amazing design inspiration. Click here to dig in!
Need a new soundtrack for your kitchen? Check out this CA GROWN Spotify playlist:
We’d love to see your creations! Share your cheese board photos with us by tagging #CAGROWN on social media.
Don’t stop here! Follow us on Pinterest for more fresh and fabulous recipe inspiration. Dive into the world of CA GROWN goodness, and let’s make every meal a celebration of the Golden State’s bounty.
How to Build a California Grown Cheese Board
Ingredients
Cheeses
- 1 soft or bloomy-rind cheese
- 1 semi-soft cheese
- 1 hard aged cheese
Fresh Fruit—choose 3-9 of whatever is in season and looks the freshest at the market!
- strawberries
- raspberries
- blackberries
- blueberries
- cherries
- peaches nectarines, and plums
- figs
- grapes
- apples and pears
- persimmons
- tangerines
Dried Fruit—choose 2-3
- dried apricots
- candied citrus
- dried citrus
- dates
- dried figs
- prunes
- raisins
- dried persimmons
Nuts—choose 1-3
- almonds
- pistachios
- walnuts
Sweet and Savory Spreads—at least 1
- honey or make it extra! California Grown Whipped Honey Recipe
- fruit spread like fig jam or Pinot Prune Jam
- mostarda – make it extra! California Prunes sweet and tangy Prune Mostarda
- mustard
Little Pickled Extras—nice to have
- California Ripe Olives
- pickled onions
- marinated artichokes
- Crackers and bread
Garnishes—to make it extra (but effortless)
- fresh herbs
- edible flowers
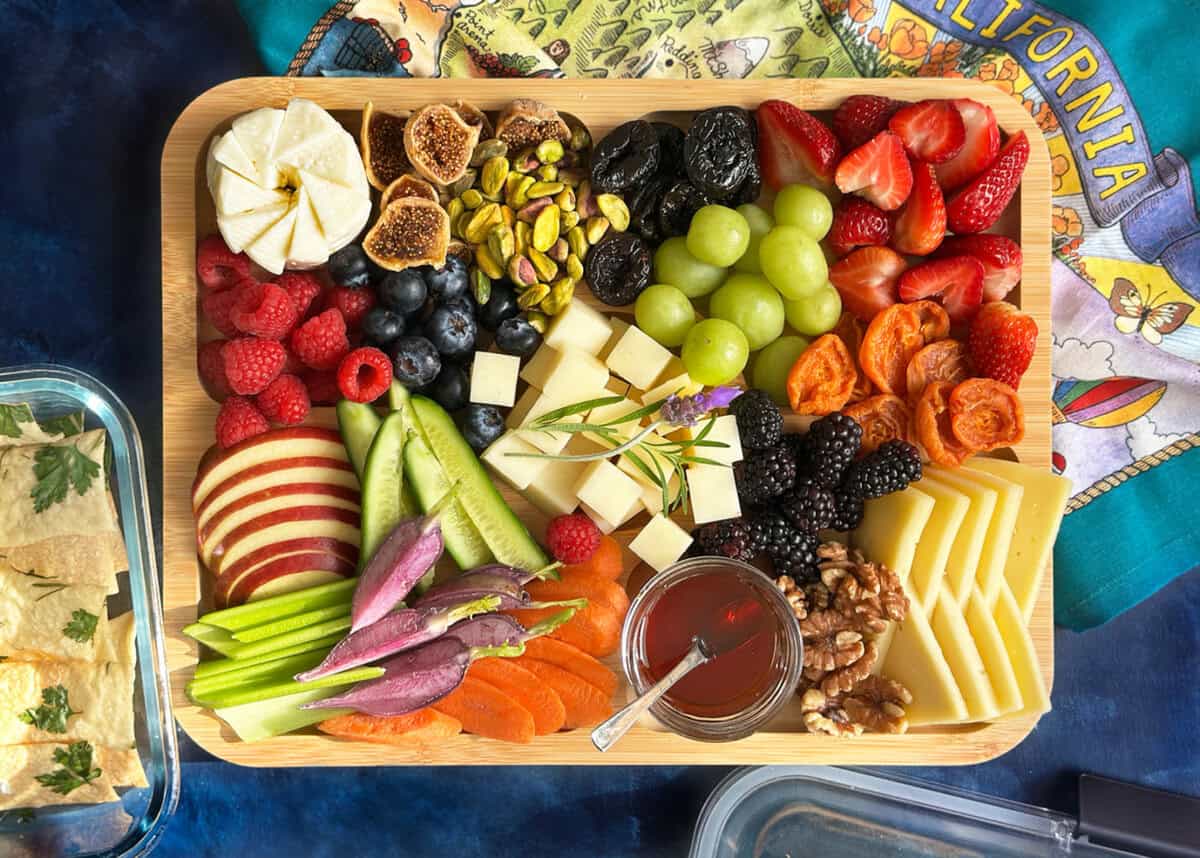
Instructions
- Remove cheeses from the refrigerator and while still firm, slice semi-soft and hard cheeses for presentation. You can leave soft cheeses as is. Set cheeses aside for about 30 minutes to take the chill off from the refrigerator.
- Arrange cheeses on board. For the soft cheese, slice through with a small serving knife to “get it started” for guests.
- Place small bowls with spreads and pickled extras near cheeses to complement their flavors, and toward the edge of the board or platter to make it easier to access without spilling over the rest of the board.
- Add fresh fruit, dried fruit, and nuts in empty spaces.
- Garnish at the end with fresh herbs and flowers if using.
Notes
- stable cutting board
- very sharp knife for cutting cheese and prepping any fruit and vegetables
- large board or platter
- small knives for soft cheeses
- small serving bowls for spreads and pickled things
- small spoons for spreads
Meet California Grown Creator Sarah Gim of The Delicious Life
Sarah is the fairy godmother of food porn. She started her blog, The Delicious Life, as a cathartic outlet – and her fabulous food photos and snarky snippets made her a social media sensation. Her viral “fry boards” sparked one of the most important internet debates in recent history, asking: does a tater tot count as a fry?

In 2007, Sarah formed Tastespotting, a highly visual potluck of recipes, references, experiences, stories, articles, products, and anything else that inspires exquisite taste. The site curates and features only the most drool-worthy food images available on the interwebs.
When you’re ready to get your gorgeous food game together, check out Sarah’s Pinot Prune Jam + Cheeseboard Guide, this Salmon with Green Olive Salsa Verde, or these Triple-Whipped Sweet Potatoes. Sarah loves ALL California crops (and the wine!), but our avocados have her heart.