
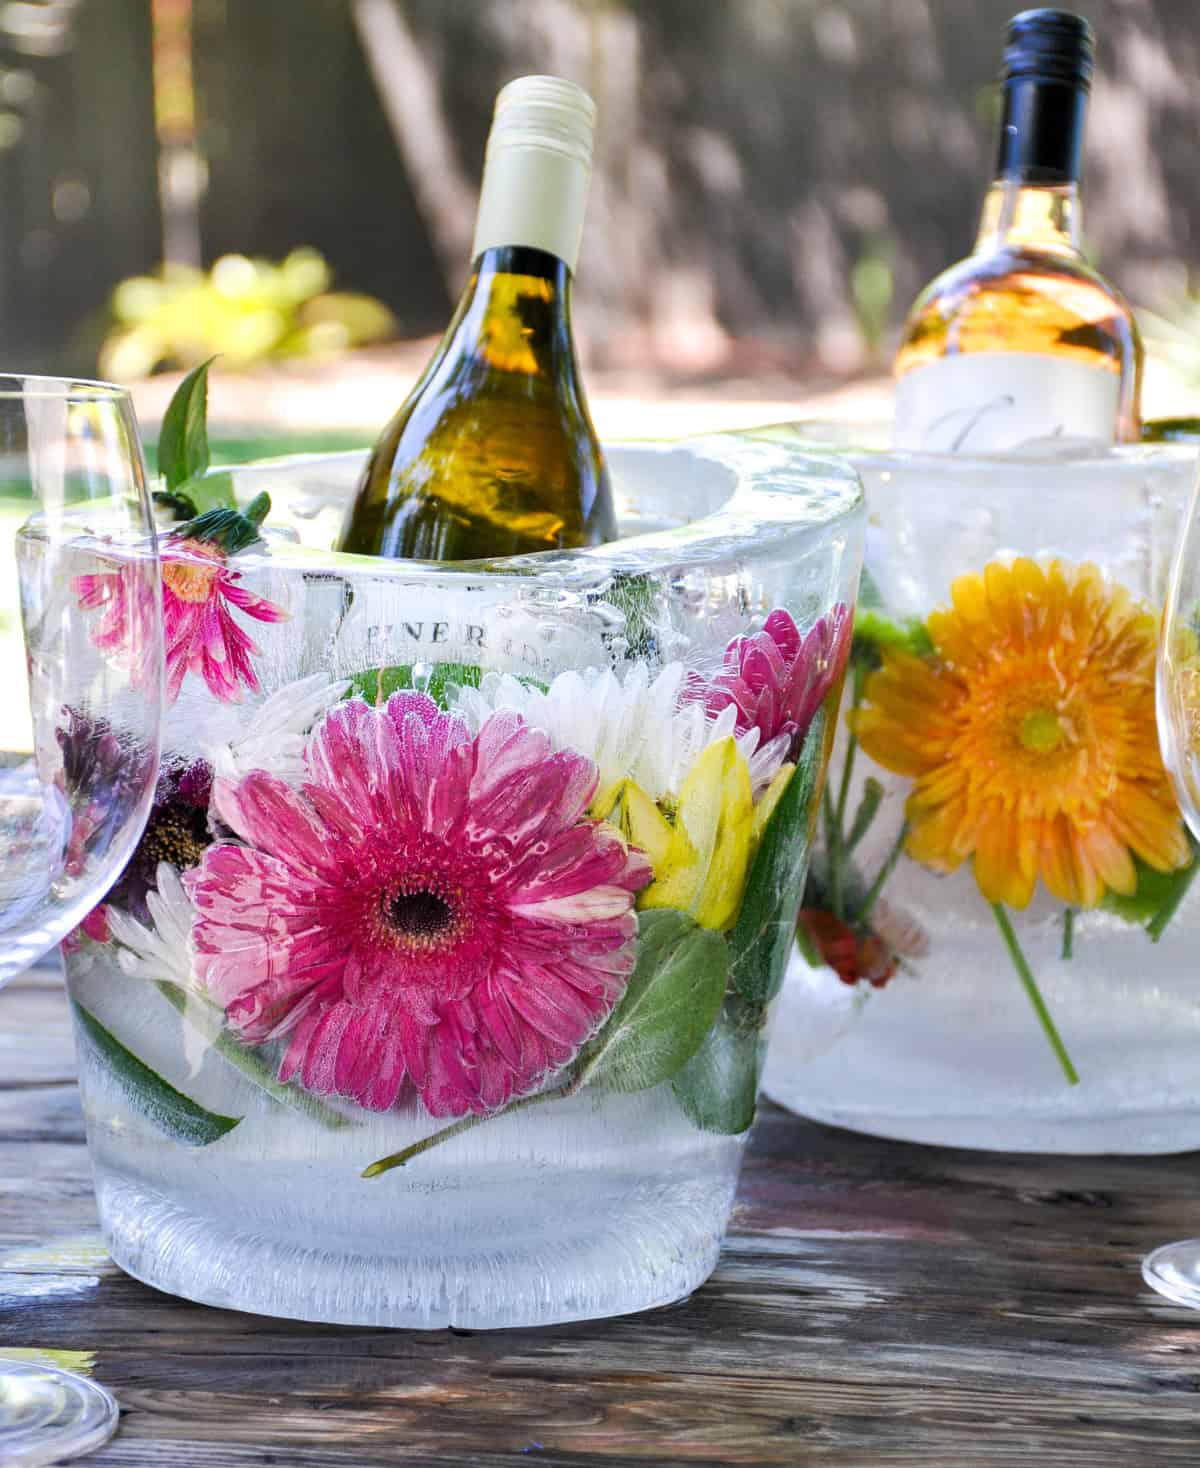
How to Make a Floral Ice Bucket
The weather is warming up, and that means it’s time to kick back and enjoy a glass of ice-cold California wine! It can be difficult to find the perfect container for chilled wine, but it is essential to keeping your wine from getting too hot. Fortunately, we have just the thing! Our floral ice bucket will hold a bottle of wine in style and keep it chilled to perfection too!
***This blog post updated 9/2021 with new content, tutorial, images, and information about California Grown flowers***
Before we talk about the ice buckets themselves, let’s talk about flowers!
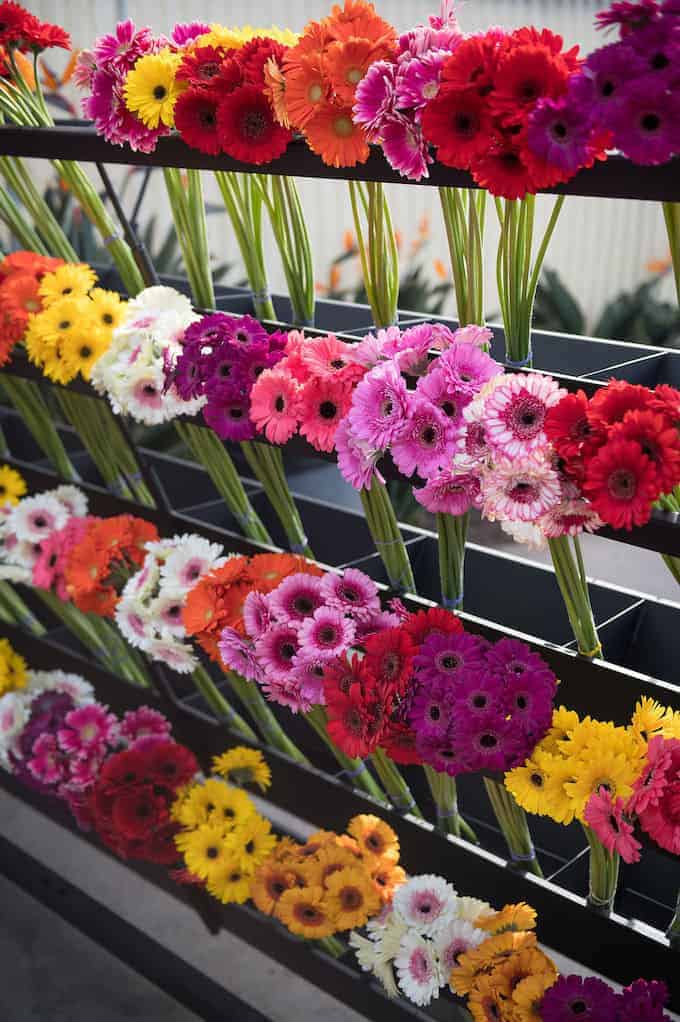
These beautiful ice buckets are made with a colorful mix of California grown cut flowers which make it a really colorful and festive addition to any occasion! Just look at those Gerbera Daisies!

Here is how to tell if the flowers at the store are California Grown.
Did you know that California is America’s leading producer of high-quality cut flowers and greens? It’s true! California supplies over 75% of all domestically grown cut flowers in the United States.
When purchasing cut flowers at the grocery store, look for the blue California Grown license plate on the packaging! When you purchase flowers with the California Grown logo you are helping to support California flower growers.
What type of water is needed to make an ice bucket?
It is important when making an ice bucket for display like this one or when you are making any ice creation like decorative ice cubes, that you use filtered water. Filtered water creates a beautifully clear final product when it comes to ice while your tap water will create cloudy frozen creations – not what you want with a centerpiece like this one.
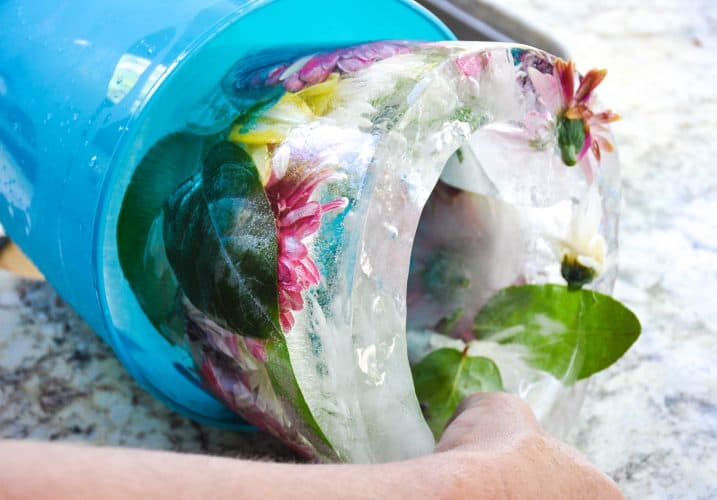
Here’s how you can make a floral ice bucket to keep wine chilled at your next gathering!
Step 1
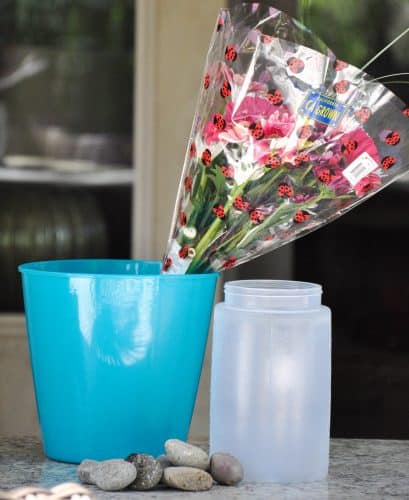
Gather your supplies:
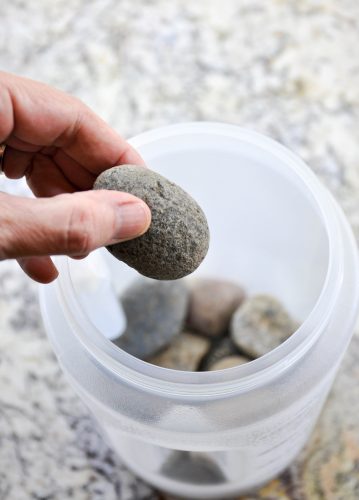
You will need two buckets, one larger than the other. Make sure the smaller container fits inside the larger one with plenty of room in between.
You will also need small rocks, filtered water, and California Grown cut flowers.
Step 2
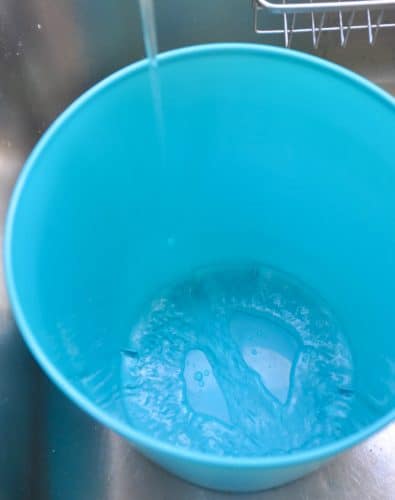
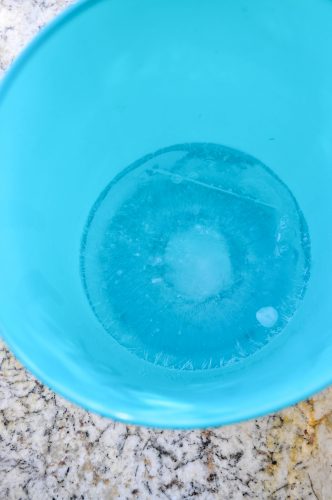
Fill only the bottom of the larger bucket with filtered water.

Step 3
Keep the water level at the bottom at about two inches for the base. Freeze for 2-4 hours until hardened.
Step 4
Once the water at the bottom of the bucket is frozen, pull it from the freezer.
Step 5
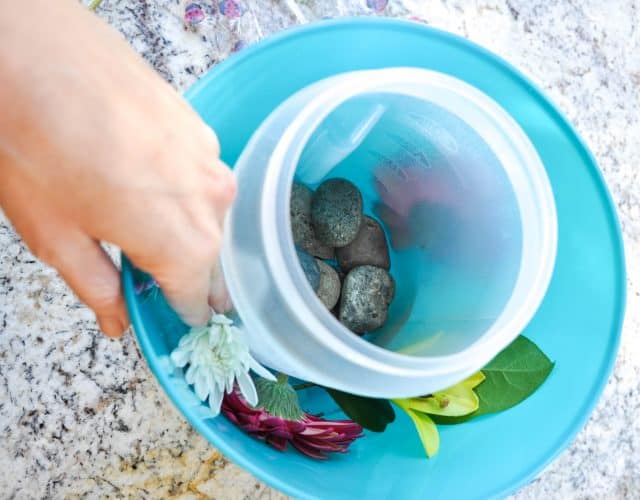
Place rocks in the bottom of the smaller container to weigh it down once water and flowers are added to the larger mold.
Step 6
Place the rock-filled container in the center of the large bucket, right on top of the hardened ice.
Cut the stems from the flowers and start pushing them down into position, being mindful of your position and color choices.
Step 7
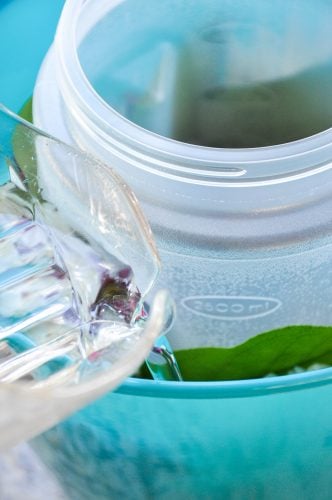
Add water to the outer bucket until about an inch from the top. Transfer back to the freezer and freeze overnight.
Step 8
Run warm water around the entire form and over the ice to loosen the sides of both the outer and inner bucket. They should release pretty easily after 15 or 30 seconds.
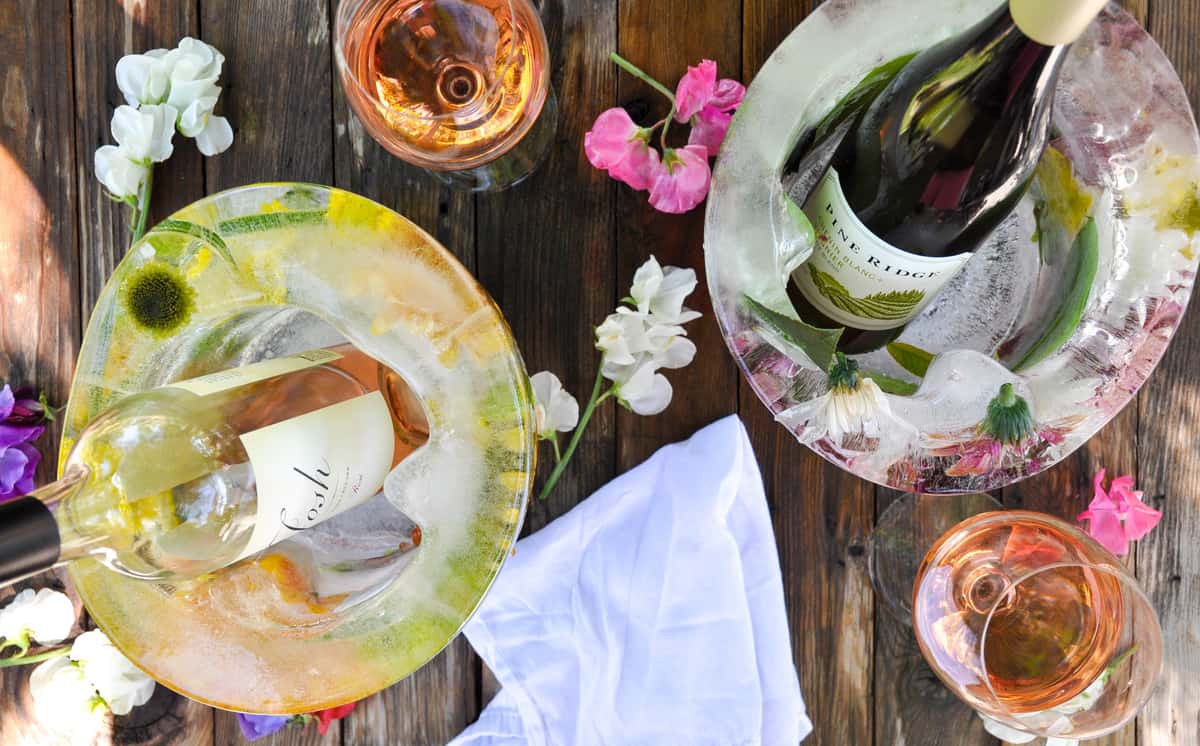
All that is left is to immediately add your bottle of chilled wine and serve!!
I mean, just talk about a stunning presentation! Plus, this is one of those DIY’s that is easily customizable all year long based on which flowers are readily available at your local market and what color scheme you are going for.
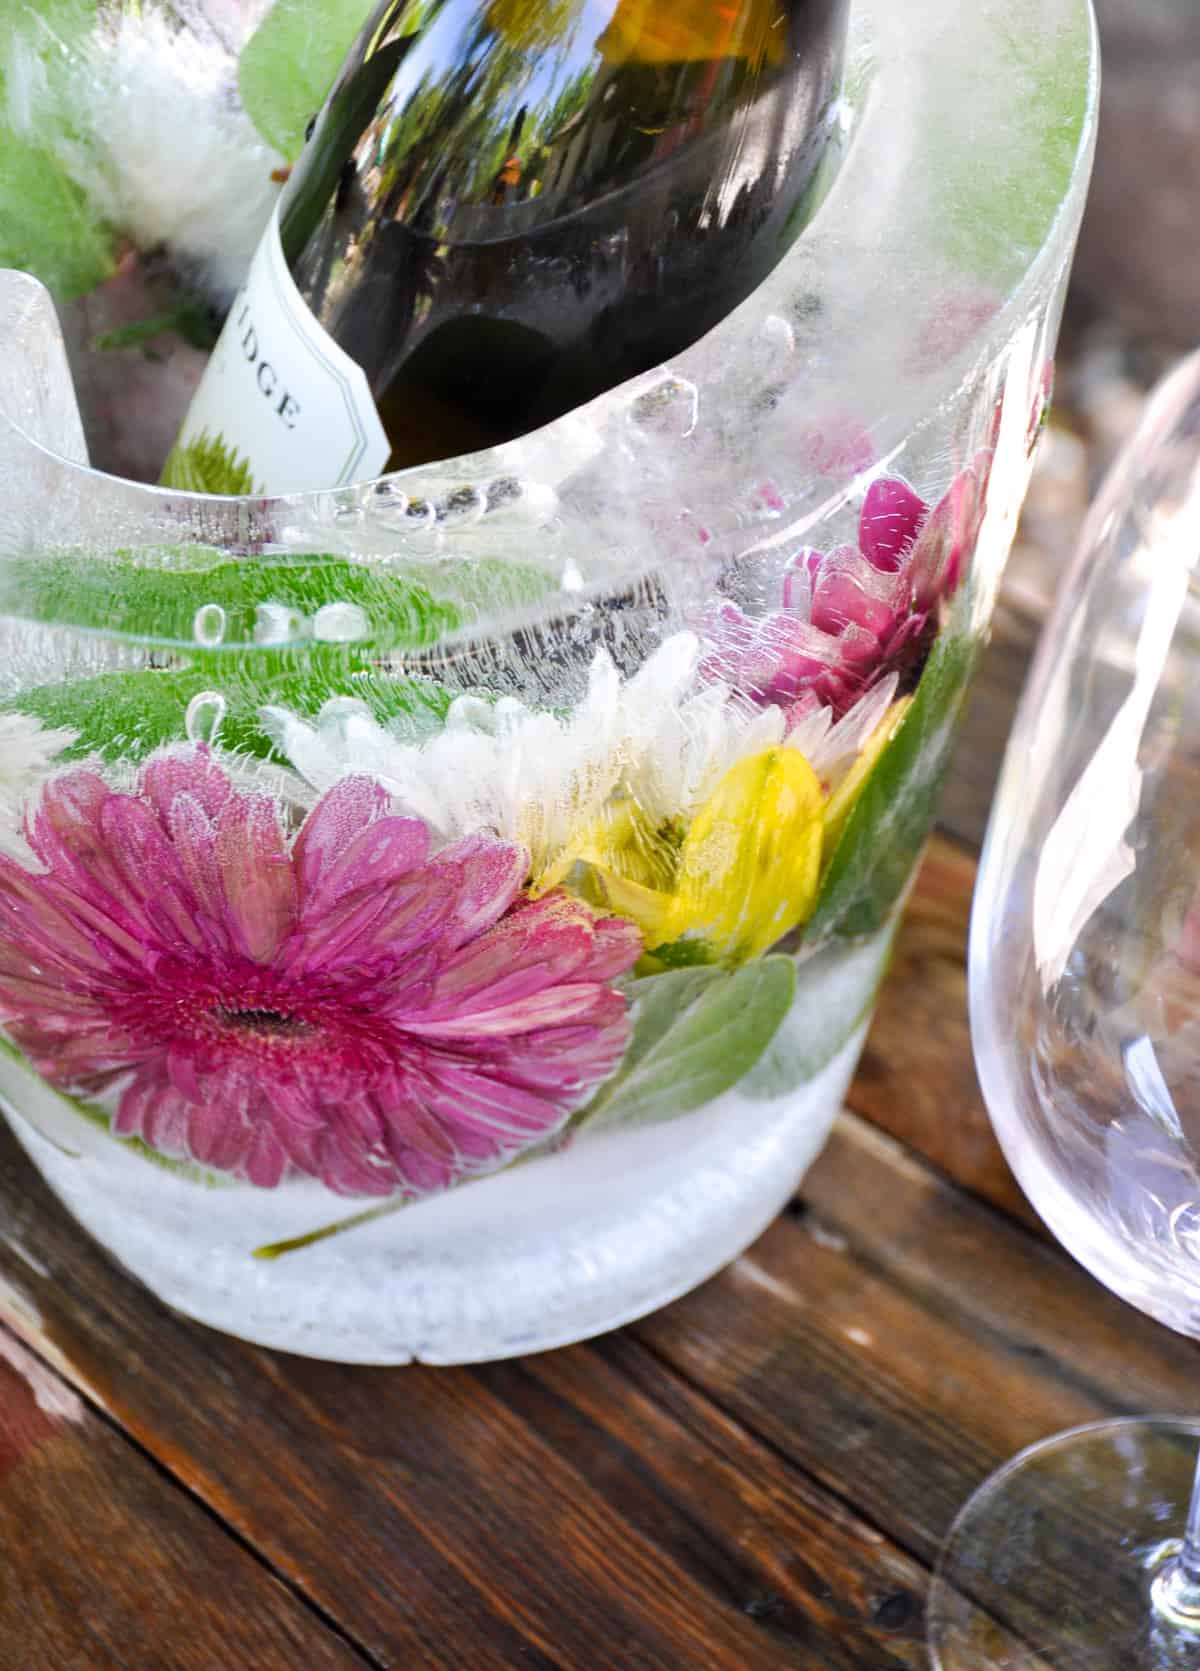
Be sure to place the ice bucket on a platter of some sort when in use to catch any drips as it melts.
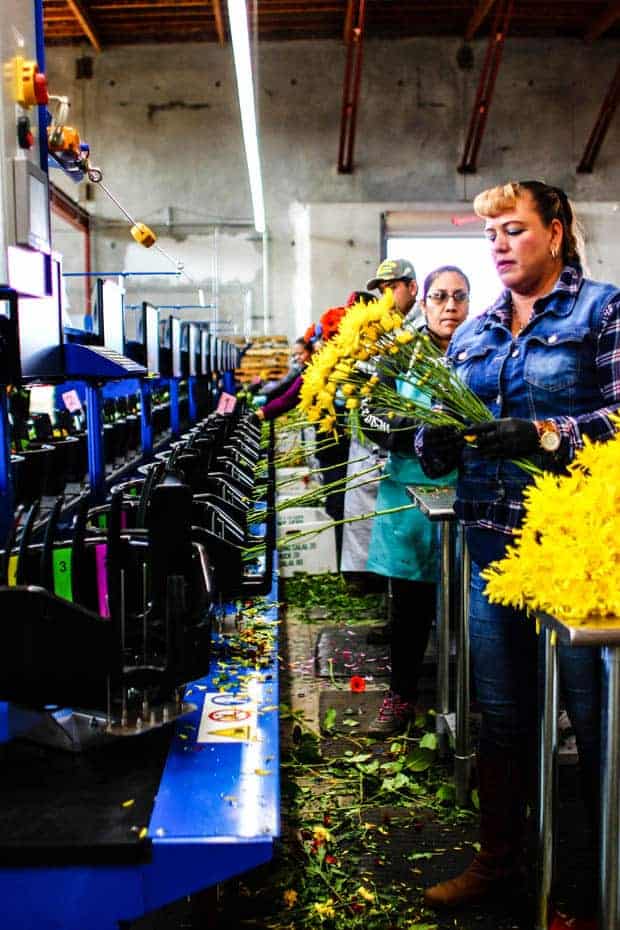
Are you curious about how cut flowers are grown and harvested to be sold as bouquets?
The process is truly fascinating and the growers are passionate with personalities as colorful as the blooms they curate! We recently sent a group of bloggers on a tour with Farmer Rene Van Wingerden of Ocean Breeze Farm. While they were there, they experienced everything from the greenhouses where Rene grows a rainbow of Gerbera daisies to the cut flower packing house and bouquet production line.
It is a truly fascinating process that we think you will enjoy, so keep reading and take a look by clicking Meg and Kate’s experience links!
Meg of This Mess is Ours:
“It’s easy to support America’s flower growers though, all you have to do is look for and ask for California Grown (or American Grown) blooms! Not only will you be supporting local farms, but your flowers will last longer because they haven’t been imported long distances!“
Kate of Hola Jalapeno:
“The hydroponic greenhouses, as well as their cut flower packing house and bouquet production line, grow stunning blossoms that can be found at many grocery stores and flower shops.“
Saved as a favorite, I love your blog!
How do you keep the ice from melting all over the table ?
Great question – you would need to place the floral ice bucket on a platter of some sort when serving to catch any melts.
How long can it sit out in a room temperature before melting and becoming a big mess even with a platter underneath?
The floral ice bucket should stay frozen, indoors, for at least 3 hours. Outside in warm weather, it will last less than 1.5 hours. I always like to pop a tray under mine to catch any drips.
Hi, great directions. Could this stay frozen for a few days if needing to make ahead of time? Wondering if the flowers would lose their color?
Hey Kim, great question! Yes, this would be fine if kept frozen for a few days in advance.