CA GROWN Blog
Discover. Learn. Connect.
A Recipe for Homemade Fig Bars You’ll Love
Meet Them Here
Read Bios »A Recipe for Homemade Fig Bars You’ll Love
If you grew up reaching for those chewy, jam-filled fig bars, you know the magic of a good fig-filled snack. But let’s be real—store-bought fig bars often come with a side of preservatives, artificial flavors, and way more sugar than necessary. So, why not make your own?
The Perfect Balance of Nostalgia and Nutrition
Homemade fig bars are not just a healthier alternative; they’re also incredibly easy to whip up with simple ingredients like dried figs, almond flour, and honey. Plus, when you make them at home, you get to control the sweetness, texture, and overall deliciousness factor. If you’re a Fig Newton fan, get ready to fall in love all over again!

The California Fig Advantage
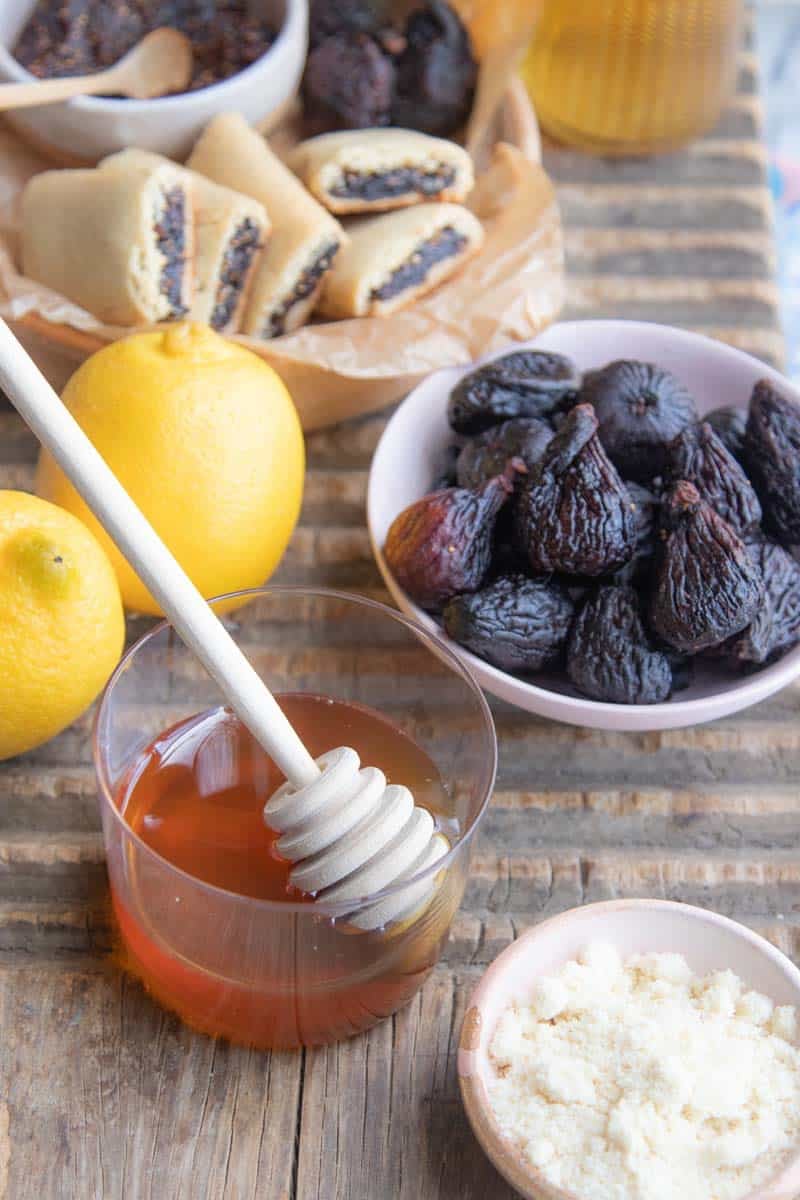
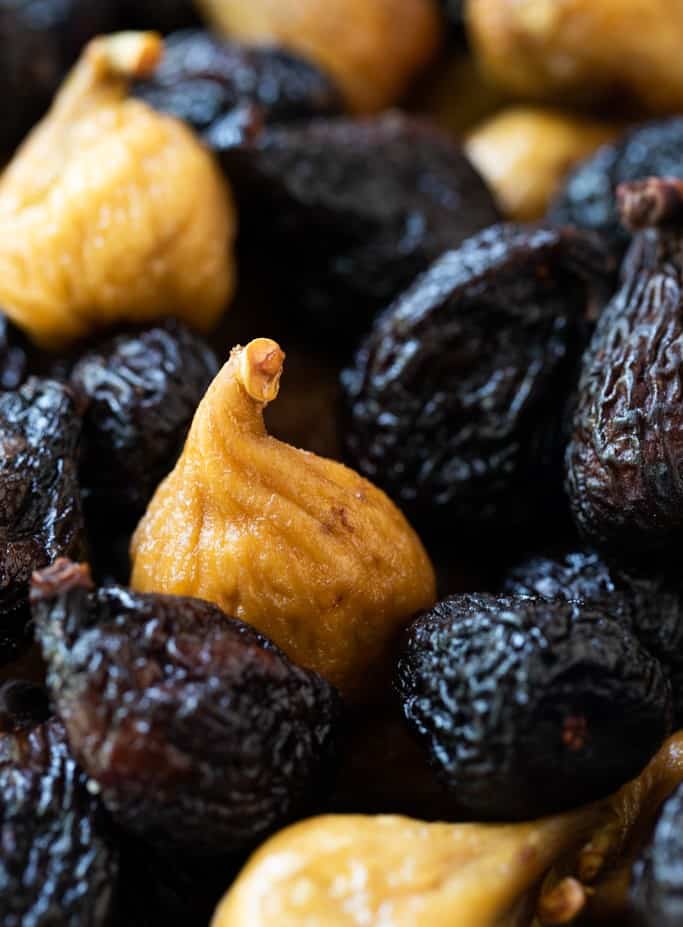
Before we dive into the recipe, let’s talk figs—specifically, CA GROWN figs. Did you know that 100% of the nation’s dried figs and 98% of its fresh figs are grown in California? That’s right. Whether you’re snacking on golden or black mission figs, chances are they came straight from the Golden State.
Fun Fig Facts:
- Two main types of dried figs: Mission figs (deep, rich flavor) and Golden figs (lighter, honey-like taste).
- Figs are a natural energy source: With no added sugars, California figs provide complex carbohydrates for sustained energy, making them a perfect pre-workout snack.
- Calcium powerhouse: A ½ cup of dried figs packs as much calcium as a ½ cup of milk.
- Nutrient-dense: Figs contain more calcium, iron, magnesium, and phosphorus than most other fruits.
The Key Ingredients for the Best Homemade Fig Bars
Let’s break down what makes these homemade fig bars not just good but downright addictive.
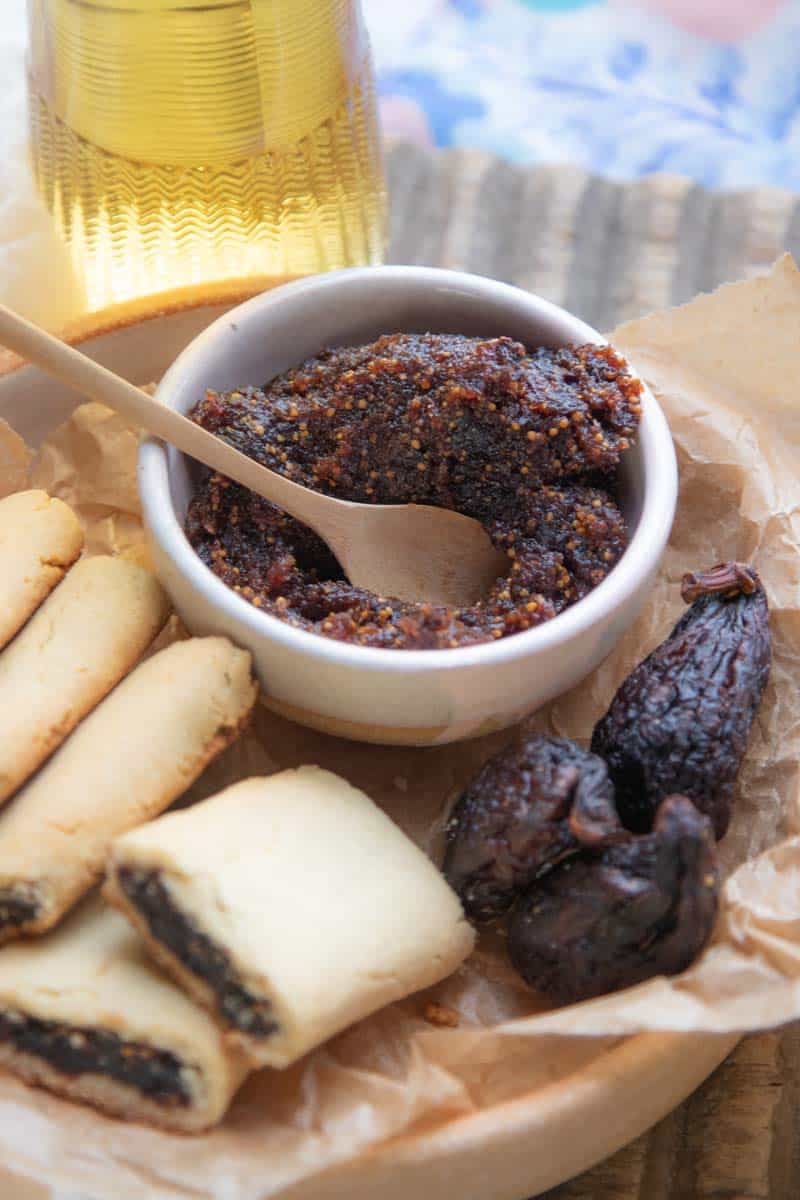
The Filling:
Dried Mission figs – their deep, jammy sweetness is the heart of this recipe.
Apple juice – adds a natural sweetness and helps soften the figs into a luscious paste.
Lemon juice – a splash of acidity balances the sweetness and brightens the flavors.

The Crust:
- Almond flour – gives these bars a slightly nutty, tender texture.
- Coconut flour & corn starch – create the perfect soft dough that holds together, and has great texture, while staying gluten-free.
- Honey – just a touch to enhance the natural sweetness.
- Cold butter – helps create that perfectly flaky, slightly crumbly texture.

How to Make Fig Bars Like a Pro
Alright, let’s talk process. Making fig bars from scratch might sound intimidating, but trust me, it’s easier than you think. If you’ve got a food processor and a rolling pin you’re halfway there.
Step 1: Prepare the fig filling
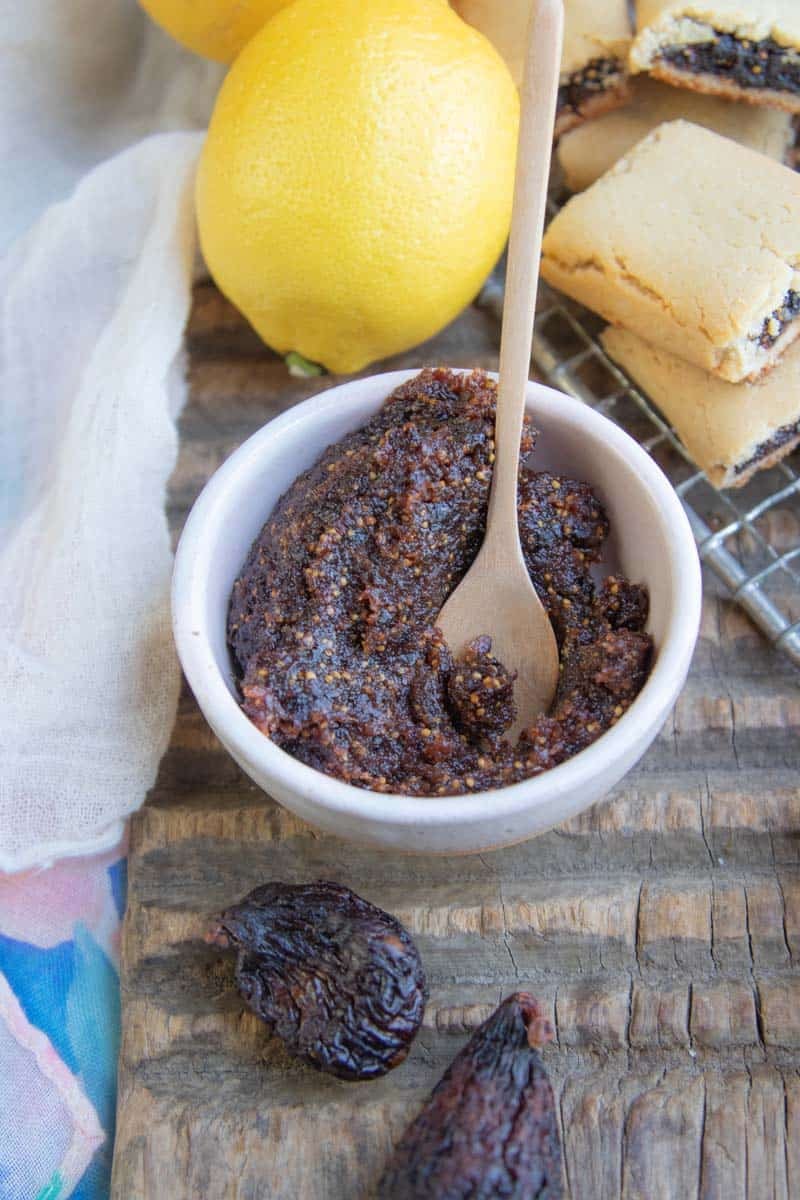
- Simmer the dried figs with apple juice and a pinch of salt until soft and syrupy.
- Blend the mixture in a food processor with lemon juice until it becomes a smooth, thick fig paste.
Step 2: Make the crust
- Pulse together almond flour, coconut flour, corn starch, and salt.
- Add honey and egg, then mix in cold butter until a soft dough forms.
- Roll out the dough between pieces of parchment paper for easy handling.
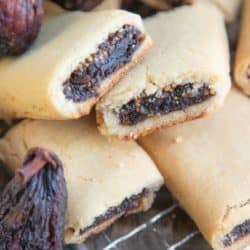
Step 3: Assemble and bake
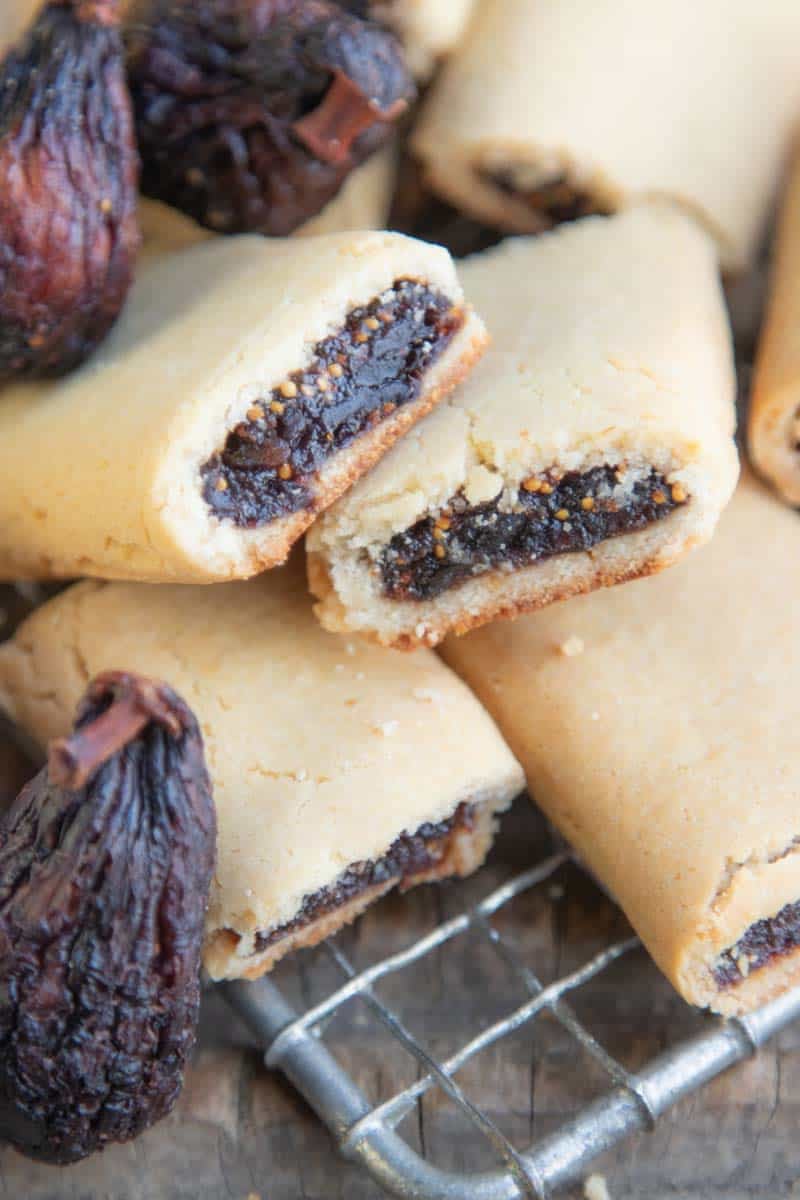
- Slice the dough into four strips, spread the fig mixture down the center, and fold it over to create filled logs.
- Transfer the logs to a baking sheet, press gently to flatten with the heel of your hand, and bake until golden brown.
- Cool before slicing into bars—if you can wait that long!
How to Store Homemade Fig Bars
Freshly baked fig bars should be stored in an airtight container at room temperature for up to five days. If you want to extend their life, pop them in the fridge or freeze them for up to three months. Just be sure to layer them between pieces of parchment paper to prevent sticking.

Why You’ll Never Buy Store-Bought Again
Once you try these homemade fig bars, there’s no going back. They’re:
✅ Soft and chewy with the perfect fig filling-to-crust ratio.
✅ Made with whole ingredients, you can feel good about.
✅ Naturally sweetened, without the overload of processed sugar.
✅ Packed with real, CA GROWN dried figs that bring a depth of flavor you won’t find in store-bought fig bars.
So, what are you waiting for? Grab some dried figs, preheat that oven, and get baking.
NEED A PLAYLIST FOR BAKING? CHECK OUT THIS CA GROWN SPOTIFY PLAYLIST:
Tried this recipe? Let us know how it turned out! Share your fig bar creations using #CAGROWN or tag us on Instagram.
Craving more CA GROWN goodness? Follow us on Pinterest for fresh and fabulous recipe inspiration!
Homemade Fig Bars
Equipment
- food processor
- wax paper
- Rolling Pin
- Sheet pan
- parchment paper
Ingredients
For the Fig Filling
- 9 ounces dried Mission figs stemmed and halved
- 2 cups apple juice
- 1/4 tsp salt
- 2 tsp fresh lemon juice
For the crust
- 1 cup blanched almond flour
- 1/4 cup coconut flour
- 1/4 cup corn starch or tapioca starch/flour
- 1/4 tsp salt
- 1 large egg
- 2 TBSP honey
- 4 TBSP cold butter cut into small cubes
Instructions
FOR THE FILLING:
- Simmer the figs, apple juice, and salt in a medium saucepan over medium heat, stirring occasionally, until the figs are very soft and the juice is syrupy, about 25 minutes. When they're done, there should only be 3-4 tablespoons of liquid remaining in the pan.
- Let the mixture cool slightly. Puree the figs in a food processor with the lemon juice until the mixture has a very thick consistency and all of th enlarge pieces have been broken down. Around 10 seconds.
FOR THE CRUST:
- Preheat the oven to 350℉ (180℃). Cover a standard baking pan with parchment paper or a nonstick pad and set aside.
- Pulse the almond flour, coconut flour, tapioca flour, and the salt together several times to combine.
- Add the egg and honey, and process for a few seconds to combine.
- Add the butter and process until the dough comes together into a ball. You shouldn’t be able to see any large clumps of butter left in the dough.
- Divide the dough in half and gather each half into a ball. Place one ball of dough on a piece of wax paper, cover with another piece of wax paper, and roll out into a rectangle about 1/2 cm thick.
- Slice the rectangle in half lengthwise to form two long strips.
- Divide the filling into four equal portions and spread one-quarter of the filling along the length of each of the two strips, leaving about a 1/2" border of dough around the edgesSet aside the other two portions of filling.
- Pick up the wax paper and use it to gently fold each strip of dough over onto itself, forming two filled logs. Gently press the edges along the seem together to seal each log and then carefully transfer it to the prepared baking sheet. Flatten each slightly with the heel of your hand.
- Repeat the process with the remaining dough and filling. You should have a total of four logs.
- Bake for 20-25 minutes until the logs are slightly golden around the edges.
- Let cool until they are comfortable enough to handle, then cut into 1 1/2" – 2" -inch slices and transfer to a wire rack to cool completely before serving.
Video
Notes
Nutrition
So Many Fig Bar Recipes, So Little Time
A quick Google search of the term fig bar or fig bars will bring up a myriad of different desserts—most notably Fig Newton-style bars. But did you know there are actually several delicious variations of this classic treat?
Classic fig bars, like the nostalgic Fig Newtons, feature a soft, cake-like exterior wrapped around a sweet, jammy fig filling—perfect for a grab-and-go snack. Our homemade fig bars take things up a notch with wholesome ingredients like almond flour, honey, and fresh lemon juice, offering a more natural, customizable version without preservatives or excess sugar.
Then there are layered fig bars, which stack a rich fig mixture between buttery crusts and crumbly toppings, creating a decadent treat that feels like a cross between a cookie and a dessert bar.
And if you’re looking for a gluten-free twist, fig-filled cookies bring all the nostalgic flavor with a tender, golden dough, and a naturally sweet fig filling, making them a must-try for anyone craving a g-free version of their favorite childhood treat.
No matter your preference, one thing’s for sure—CA GROWN figs make every bite irresistibly good!
Here are a few of our favorite recipes for fig bars and cookies:
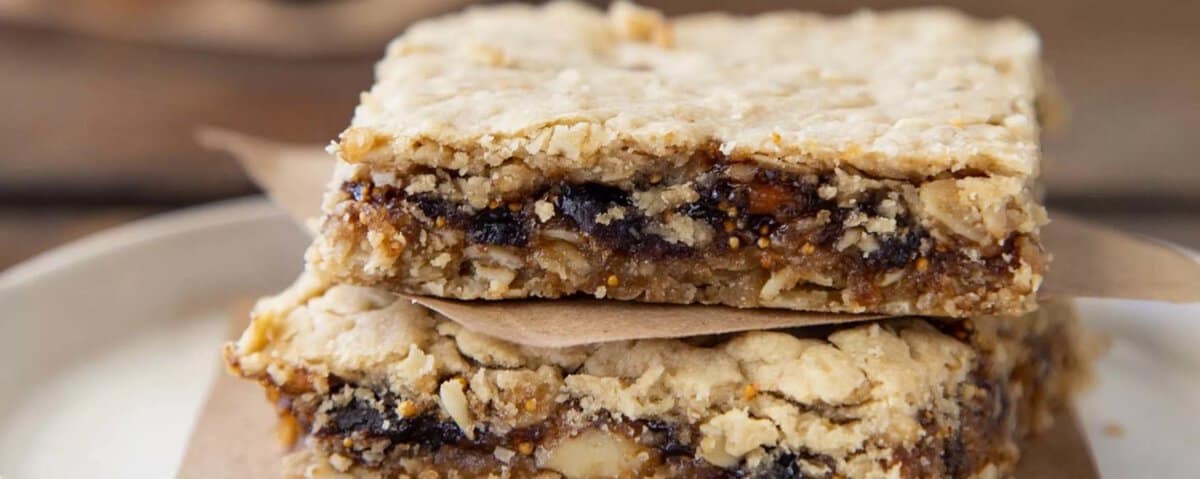


- California Fig Layer Bars: These fig bars from California Figs are a game-changer—think soft, buttery crust, a rich, jammy fig filling, and a crumbly topping that hits just the right balance of sweet and nutty. Made with CA GROWN figs, these bars are naturally sweet, packed with fiber, and perfect for a wholesome snack or dessert. Whether you’re a lifelong fig fan or just discovering their magic, this easy recipe is one you’ll want on repeat!
- G-Free Italian Fig Cookies: These gluten-free fig cookies from G-Free Foodie are the ultimate homemade treat—soft, chewy, and bursting with naturally sweet fig filling wrapped in a tender, golden dough. Made with CA GROWN dried figs, a touch of honey, and warm spices, they deliver the perfect balance of nostalgia and nutrition. Whether you’re a longtime Fig Newton fan or just love a good sweet snack, these cookies are a must-try. Plus, they’re gluten-free, so everyone can enjoy them without compromise!
- California Fig Nanaimo Bars: These bars put a delicious twist on the classic no-bake treat, layering a rich, chocolatey base with a luscious fig-infused custard filling and a smooth chocolate topping. Made with CA GROWN figs, these bars are naturally sweet, packed with fiber, and bring an irresistible depth of flavor to every bite. Whether you’re a longtime Nanaimo bar fan or just looking for a decadent dessert with a wholesome touch, this fig-forward version is guaranteed to impress!